Imek
Building UIs form a sketch

Inspired by this blog post from Airbnb I decided to try my luck building an Android app which would create a GUI form a sketch.
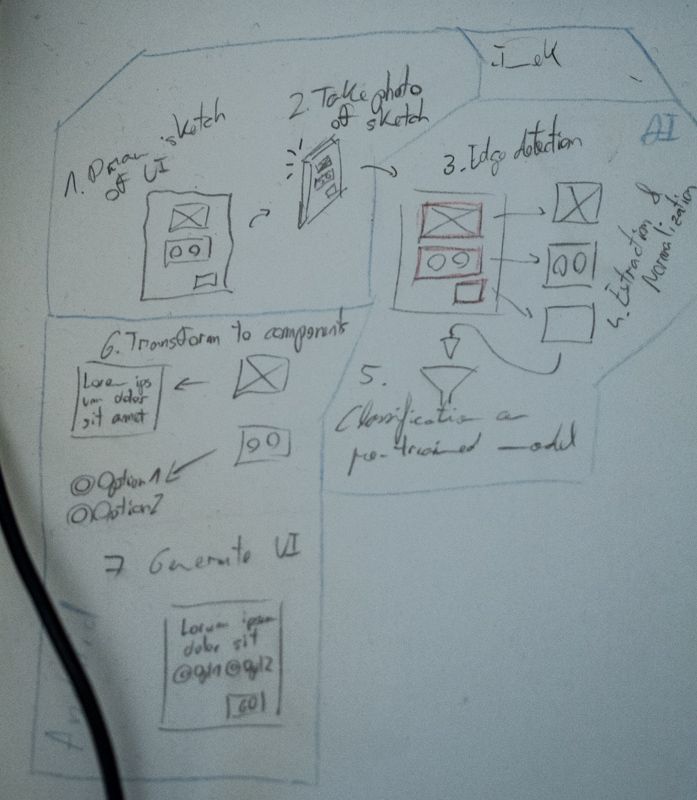
A designer will draw a quick sketch of the desired GUI, and then photograph it with the Imek app. Imek will then analyze the sketch, extracting the sketched GUI components and the way they are ordered. The app will then instantiated native OS components and create a GUI in the same order as in the sketch. The end result will be a mock GUI created the same way as in the sketch.
This project will contain:
- Image processing –> To parse the sketch
- Machine learning –> To interpret the parsed figures
- Android programming –> To dynamically generate a GUI and present it to the user
Part 2 - Element Extraction
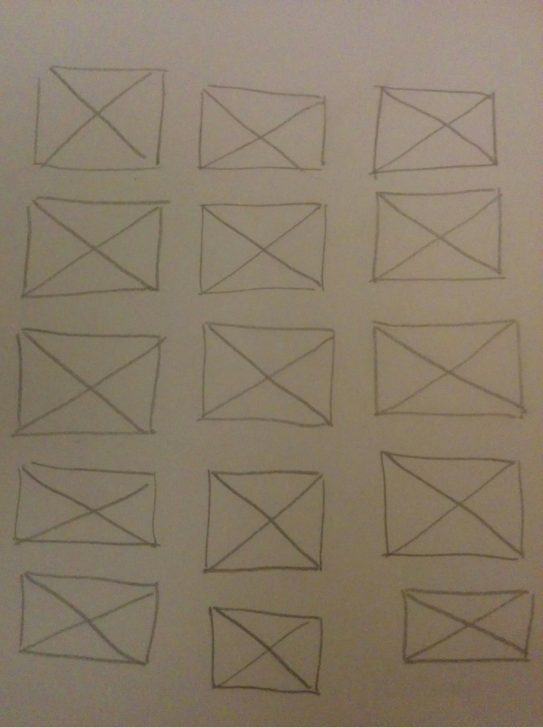
In the first iteration of the element extraction code I managed to read a squares array and create subimages with each individual square.
This is an example of the input image:
The image was manipulated using the following methods:
- Conversion to grayscale image
- Gaussian blur applied, with a 51x51 kernel, in order to eliminate small imperfections on the image
- An adaptive Gaussian thresholding is then run on the image in order to create a binary image containing the most prominent lines
- Smoothing of the resulting lines from the previous step a. 4 iterations of dilation with a 7x7 kernel b. 2 steps of erosion with a 7x7 kernel c. A Median blur is applied in order to eliminate small pixel islands which may have appeared after the dilation step
After the image is preprocessed opencv’s findCountours function is called with the cv2.RETR_EXTERNAL and cv2.CHAIN_APPROX_SIMPLE parameters. This will find the external contours of the squares.
The resulting contours are then filtered, in order to eliminate the smallest ones, which may be small pixel islands which are not a square. This step uses a hardcoded minimal area, but it should use a relative area measurement based on the image size.
With the final contours on our hands, the code proceeds to created bounding rectangles on the contours, which will contain the squares we were looking for. The following image shows the input image through some parts of the process:
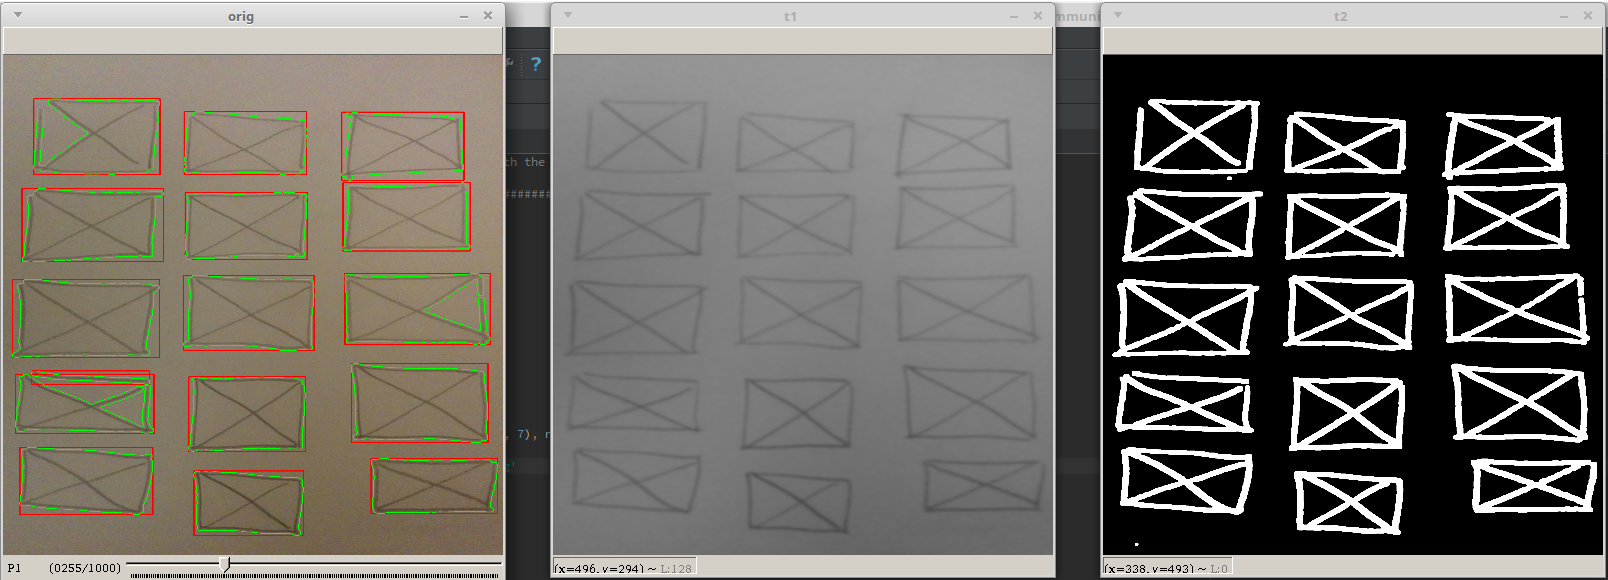
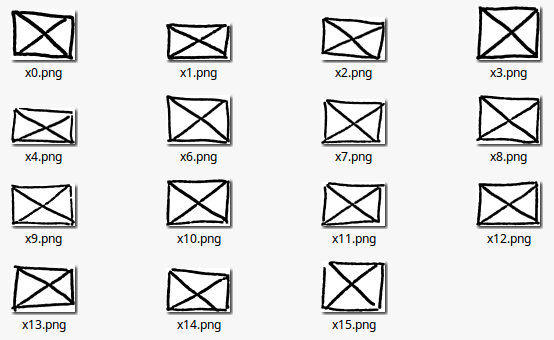
With the bounding rectangles on our hands the original image is reloaded and reprocessed again using similar steps to the ones previously described. The resulting image is used for the extraction of subimages based on the defined bounding rectangles. This process results in a list of subimages containing only the squares:
Part 3 - Element Extraction (Continued)
The third iteration of the image extraction script is a refinement on the first one. The new script lets the user play with the parameters used in the algorithms freely and save the results when the expected result is met.
This version does also take into account the order in which the elements are ordered vertically.
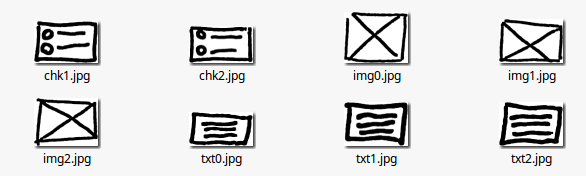
I used the script to extract 3 types of elements to train the future classifier:
Part 4 - Classifier
To know what Imek is about visit the introduction blog post.
The next step for the Imek project is to be able to classify the individual elements detected on an image. Knowing which element is represented with each image will make it possible to build the UI in the next milestone of this project.
I decided to use tensorflow as the machine learning framework to use. It struck me how difficult it seemed to simply get going and create a simple classifier. Well, after some wasted hours I stumbled upon this blog post in which the author used tensorflow’s example scripts to train a model and classify an image. It seems that using the examples provided by the tensorflow authors is a much better place to start than documentation.
With the retrain.py script I was able to quickly retrain the mobilenet_1.0_224 network. With label_image.py I tested it quickly, obtaining satisfactory results.
I then continued by taking tensorflow’s Android example and extracting the ImageCalssifier. I then built a simple prototype app which did the same classification I did manually on Android.
Part 5 - App demo
To know what Imek is about visit the introduction blog post.
Here’s a demo of the prototype app I’ve built over the last days. It takes a picture of a sketched interface, applies the image processing algorithms described in the previous blog posts and labels the extracted subimages with the retrained mobilenet neural network.
Having classified every UI fragment the app rebuilds it with native android components. For now it only builds interfaces with ImageViews, TextViews and RadioGroups.
The code is available in the Imek repo.